My friend Emily and I threw a baby shower for our friend Liz who was pregnant with twins! It was the beginning of December, so we decided on doing a baby shower with a Christmas twist (as far as decor goes).
We used a lot of woodsy things, wooden platters, a lot of trees and stumps, birds, deers; and used colors like red, burlap and gold. We served monkey bread, gourmet cheese and crackers, fruit parfaits, french toast with three different syrup flavors (my fave was the butter syrup, obviously!?). I mean, it was better than any brunch you could get anywhere else I'll tell ya that much!
I had a letter framed for Liz that she wrote to her unborn twins sitting next to the entrance for people to read throughout the open house. It was the sweetest thing, telling them what a blessing they are; and the series of events that lead up to them receiving such little miracles. As the guests left, I gave each of them a wooden ornament to hang on their Christmas tree (see post from yesterday for DIY).
One of my favorite things was the sonogram garland I made...just by making copies of all her sonograms and stringing it on a thin ribbon. I hung it on the mantle right by the gifts so everyone could take a peek at the little guys.
The amazing thing about this whole baby shower is that these little twins are miracle babies, and Liz was on bed rest for quite some time. She was always so positive and she had little John and David a few weeks early weighing in at a little over 1 lb. each.
They are all doing so great and I am just so grateful we got to shower her with so much love and cute baby necessities before all the real craziness began!
Showing posts with label brown. Show all posts
Tuesday, January 20, 2015
Wednesday, September 24, 2014
the color brown...chocolate crunch brownies
Whatever image you have in your mind about the color brown...erase it and insert this photo into your noggin' because it's probably one of my (and my families) favorite brownies to date. Well, besides my moms brownies, but anything that comes close to my moms is and should be at the top of the list.
So with that said...feast your eyes on this milk chocolatey, delectable, moooooist and richly brown brownie. Than, right before your taste buds are about to burst with envy go bake it! Have today be your "cheat day"...and tomorrow and the next. What the hells-bells you only live once, right (YOLO) !?!
***I owe this post to Candace, who was the first person to bring me a plate of these back in college. I never looked back. Thanks Candace for adding a little more junk in my trunk for many years now, and for many more to come! muah.
So with that said...feast your eyes on this milk chocolatey, delectable, moooooist and richly brown brownie. Than, right before your taste buds are about to burst with envy go bake it! Have today be your "cheat day"...and tomorrow and the next. What the hells-bells you only live once, right (YOLO) !?!
***I owe this post to Candace, who was the first person to bring me a plate of these back in college. I never looked back. Thanks Candace for adding a little more junk in my trunk for many years now, and for many more to come! muah.
CHOCOLATE CRUNCH BROWNIES
-1 cup margarine (I used butter but I'm a butter snob so if you like margarine than more power to ya)
- 2 cups sugar
- 4 eggs
- 6 TBS cocoa
- 1 cup flour
- 2 tsp. vanilla
- 1/2 tsp. salt
middle layer: 7 oz. marshmallow cream
top layer: 1 cup peanut butter
2 cups chocolate chips
First mix butter and sugar. Stir in cocoa, flour, vanilla and salt. Cook at 350 for 25 ish minutes. Depending on how your oven cooks you might want to cook it a bit longer, but don't overcook! An almost clean toothpick is what we're lookin' for here.
Take out of oven and LET COOL. Than lather on a nice layer of one 7 oz. jar of marshmallow cream. Lastly, in a bowl microwave 1 cup peanut butter with 2 cups milk chocolate chips. (about 45 seconds should do the trick) stir until it's all melted...than add about 3 cups rice crispies. Spread over marshmallow cream.
Chill for about an hour or so and enjoy.
Monday, May 5, 2014
Fudge Pecan Pie à la Mode
Happy Happy Monday AND Cinco de Mayo...two great reasons to throw a party right?! I am bummed that I never got around to posting some of my favorite ideas for this fun celebration...a lot of green, red and white pinatas, cookies, food and crafts. So to make up for that here's a dreamy, chocolatey (and very rich) fudge pie that my sweet mom brought over yesterday to enjoy with the family.
Josh described it perfect, "it's like chocolate mousse met up with brownie and had a baby" haha. It really does have a consistency between a dense brownie and a cup of airy dark chocolate mousse. Than you add a homemade crust and oh baby, baby (my favorite part of any dessert is the crust...yes I am that person who eats all the leftover crust that people for some reason leave behind?!). My mom use to take the scraps of her pie dough and bake them with cinnamon and sugar on them...it's like eating my childhood in one bite :-).
Lastly, and most importanty, this pie is to be served with icecream. Josh was pretty happy about that since he thinks all things are better with icecream. :-)
^^^lightly stir to lift the pecans off the bottom---make sure you don't cut the pie crust though^^^
^^^I never got a good shot of a slice with ice cream...but ya know when it's being devoured at lightening speed some things get put on the back burner :-)
FUDGE PIE à la Mode
2/3 cup evaporated milk
1/2 pkg. semi sweet chocolate morsels
2 TBS butter
1 cup sugar
2 TBS flour
2 large eggs
2 sp. vanilla extract
3/4 tsp kosher salt
1 cup chopped pecans
1 baked pie crust (recipe below)
1. Preheat oven to 375. Microwave first 2 ingredients in a large bowl at high 1 to 1 1/2 minutes or until melted and smooth, whisking at 30 second intervals
2. Whisk sugar and flour into chocolate mixture. Add eggs, 1 at a time, whisking just until blended after each one. Whisk in vanilla and salt. Stir in pecans. Pour mixture into uncooked pie shell.
3. Bake at 375 for about 35 minutes (don't overcook!). Let cool for 10 minutes and serve with ice cream.
Mama Lisa's Pie Crust
2 cups flour
1 tsp salt
1 cup shortening
water large amount: 1/3 cup
water small amount: 1 TBS
Mix flour and salt. Cut in shortening. Make a well in the center. First, add larger amount of water. Stir with fork until flour is absorbed and ball forms. Then add smaller amount of water, only as necessary to get moist dough (barely sitcky). Store in airtight container and refrigerate for up to eight days.
To roll out crust:
Flour board and rolling pin. Mold dough into a ball. Flatten with hand. Roll out from center to about 1/8 thick. Fold in half. Lift into pan. Crip edges with fingers. Cut off excess dough.
Wednesday, April 9, 2014
Bangin' Blueberry Crumble Bars
We went to the park for a picnic with some friends and everyone had to bring something "to share". So I went with a new recipe. I know, I know what your thinking...who tries something new to take to a bunch of people?!?! Well, I do, simply because you can't go wrong with streusel and blueberries right?!
So, without further adieu here's a few lovely photos to get your mouth watering and than to the recipe...
^^^add the cornstarch to thicken up the blueberry syrup^^^
Blueberry Crumble Bars (Color Issue Style)
Filling:
1 1/2 cups blueberries (fresh or frozen)
1/3 cup brown sugar
1 1/2 tsp. cornstarch
1 tsp. lemon zest
Crust:
1 1/2 cups oats
1 1/2 cups flour
1 cup brown sugar
1 tsp. baking powder
1/2 tsp. salt
12 TBS butter
1. In saucepan combine blueberries and brown sugar with 1/3 cup water--bring to boil. Stir occasionally until sugar is dissolved. Lower heat and simmer for 3 minutes.
2. In small bowl whisk cornstarch and 2 TBS water until dissolved. Add to simmering berries and cook while stirring for 2-3 minutes. Remove from heat and add lemon zest.
3. Mix all crust ingredients together. Pour half of the mixture in a 9x13 pan and cook at 350 for 15 minutes. Let cool briefly and spread berry mixture over it.
4. Sprinkle remaining crust mixture on top and cook for 30 minutes. Let cool or serve warm.
Thursday, February 20, 2014
DIY Growth Chart
One of my friends has a wooden growth chart that someone made for her and I LOVE it...and than I was perusing Pottery Barn Kids catalog and saw these and thought to myself "I can totally do this myself..." So I did. However, I changed a few things...like I put my numbers upright instead of sideways, but other than that it turned out pretty much how I imagined! I mean, there are a few mistakes here and there but it just gives it character...at least that's what I keep telling myself!
Now I officially have a designated measurement spot...documenting my babies as they grow (which I really wish they wouldn't do so quickly). The best part is that if we ever move it can come along with us...unlike the wall in the garage (like the one we used as kids).
This literally took me 45 minutes to do! I got a 6 foot wood slab at Home Depot, and I used leftover stain that I already had from my ottoman, and painted the measurements on with white paint. I spent a totaly of $21 rather than buying the one at Pottery Barn for $89!
I'm pretty positive this will be something I will cherish forever!
Now I officially have a designated measurement spot...documenting my babies as they grow (which I really wish they wouldn't do so quickly). The best part is that if we ever move it can come along with us...unlike the wall in the garage (like the one we used as kids).
This literally took me 45 minutes to do! I got a 6 foot wood slab at Home Depot, and I used leftover stain that I already had from my ottoman, and painted the measurements on with white paint. I spent a totaly of $21 rather than buying the one at Pottery Barn for $89!
I'm pretty positive this will be something I will cherish forever!
^^^ I tested out two different stains...and I decided to go with the lighter one called Early American by Midwax
^^^before and after^^^
^^^I used white paint and a tiny brush to fill in the measurement lines and numbers
^^^3 feet 3 inches...and I wish I could freeze her at this size forever^^^
Monday, January 27, 2014
salted caramel chocolate shavings in warm milk...aka hot chocolate
It's always a good day when you start it off drinking melted chocolate diluted with a little calcium...right?!
For Christmas Josh put some of William Sonoma's salted caramel hot chocolate and toffee sticks in my stocking! I could hardly wait to try the stuff!!!
I am finally getting around to posting about it, and actually I think it's only a holiday thing; so I apologize for teasing your taste buds, but at least you know for next year that this is a MUST HAVE!
For Christmas Josh put some of William Sonoma's salted caramel hot chocolate and toffee sticks in my stocking! I could hardly wait to try the stuff!!!
I am finally getting around to posting about it, and actually I think it's only a holiday thing; so I apologize for teasing your taste buds, but at least you know for next year that this is a MUST HAVE!
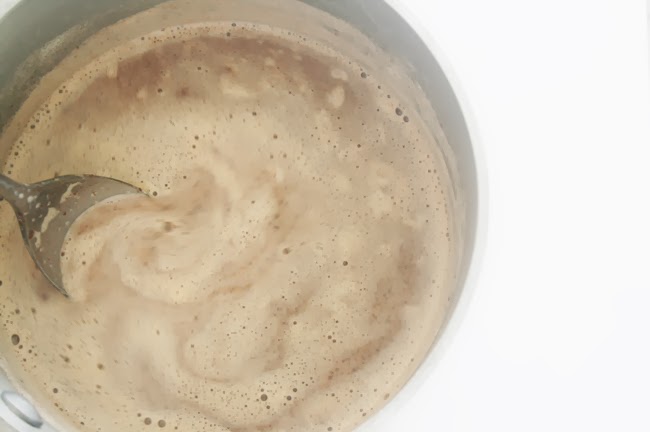
^^^ I did six TBS for about 1 1/2 of milk (what can I say, I like it chocolatey)
Subscribe to:
Posts (Atom)