


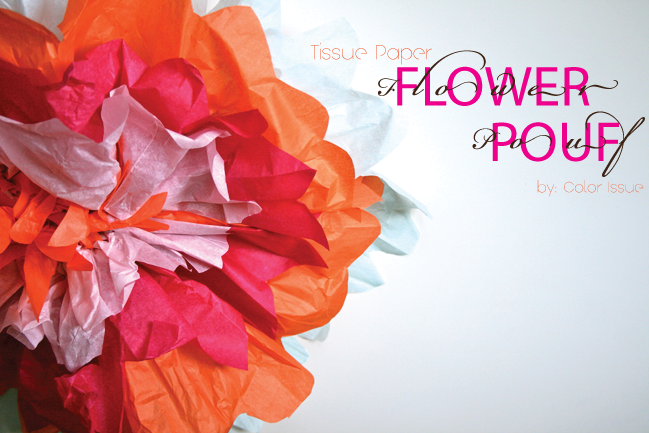
I kind of, sort of, have this slight obsession with poufs--but what's even better than plain ole' round poufs? Well, let me tell ya...FLOWER poufs! I made these for a little activity class I teach and they turned out great! Here's how you can make them with these super simple steps:
1. Pick out your tissue (I used four very different colors)

2. Cut the edges all differently (each layer needs to be smaller than the last)

3. Center them on top of eachother like below
(I know the middle one looks a bit ski-wompus...but nobody will ever notice ha)

4. Then "fan fold" from one short end to the other like this:


5. From the center, tie all layers together

6. Spread the folds apart, so that it resembles a big bow tie

7. Next, pull the layers away from one another (careful not to rip)

Than with a few tugs, and pulls--you'll have the perfect flower pouf!
***Hang them on a string from the ceiling, or tape them against a wall...ya really can't go wrong!***

Lastly, do the flower pouf ball dance :-)--this is a must!

Happy poufing!


Beautiful colors, thanks for sharing!
ReplyDeleteHave a lovely day!
xx
Oh, I love making those!
ReplyDeleteYou also got awarded on my blog: http://readerofcreativity.blogspot.com/2012/08/colorful-blog-award.html
Go check it out!
~Jenny
This comment has been removed by the author.
ReplyDeleteI am dying to use some LARGE flowers in a photo shoot. These seem simple enough. I am also dying to learn how to make my own cinemagraphs. You must be in activity day girls? This would be a fun one for them!
ReplyDeletehaha yes activity days is what I get to do! Love the girls!
DeleteHow funny! I am babysitting this week, and I was planning on preparing some fun craft work for the kids. I saw a similar project on Martha Stewart site and was determined to do it with the kids. Yours look amazing, darling! xoxo
ReplyDeleteoh they'd love this Elsa!
DeleteThey are so sweet!
ReplyDeletehttp://shannonhearts.blogspot.com/
I love this idea! maybe I'll make some Christmas poofs come December.
ReplyDelete<3 Melissa
wildflwrchild.blogspot.com
love this! One of my friends did this for my birthday surprise.
ReplyDeletewww.eatblogpray.blogspot.com
xo
These are so cute :) great diy
ReplyDeletesuch an easy idea and great touch to any party.
ReplyDeletethanks for sharing!
xo the egg out west.
Thank you for showing me how easy it is to make these pretty decorations!
ReplyDelete